|
| |||||
Sandbox1
From Brooklyn Centre Wiki
(→External Images and Text Wrapping) |
(→TABLES) |
||
| Line 161: | Line 161: | ||
==TABLES== | ==TABLES== | ||
| - | To generate a quick Wiki table, create a spreadsheet using some external program like '''Excel''' or '''OpenOffice''', then copy the cells and paste them in at this website: [http:// | + | To generate a quick Wiki table, create a spreadsheet using some external program like '''Excel''' or '''OpenOffice''', then copy the cells and paste them in at this website: [http://excel2wiki.net Excel Spreadsheet to Wiki Converter]. The generated text can then be copied and pasted into a Wiki page. |
(Note that if you want borders, the table markup will typically not render them on empty cells. A couple of ways around this are to do a search and replace in your spreadsheet software to look for empty cells and replace them with period. Normally, in normal HTML markup, you would use a non-printing space (  ;) but the converter at the above website converts them to spaces, thus negating your efforts.) | (Note that if you want borders, the table markup will typically not render them on empty cells. A couple of ways around this are to do a search and replace in your spreadsheet software to look for empty cells and replace them with period. Normally, in normal HTML markup, you would use a non-printing space (  ;) but the converter at the above website converts them to spaces, thus negating your efforts.) | ||
| - | |||
| - | |||
==COLUMNS== | ==COLUMNS== | ||
Revision as of 18:58, 1 January 2014
Contents |
WIKI CODING TIPS
The following examples can be used for reference when coding Wiki pages. Please don't alter this page.
ADD NEW EDITING BUTTON
- Create a new .png button and upload to /skins/common/images
- Add new array to /includes/EditPage.php (around line 1683 in version 1.6.10)
See this URL for more detailed instructions:
http://meta.wikimedia.org/wiki/Customizing:Edit_Toolbar
MP3 PLAYER
This Wiki is using the [flashmp3 player extension].
The player uses this tagging to play an mp3:
How to code it:
<flashmp3>http://zodiacal.com/brooklyn/Lulajze.mp3|autostart=no|loop=no</flashmp3>
What it looks like:
</nowiki>
CITATIONS
The extension Cite.php has been added to this WIKI.
Information on this extension can be found at Cite by Ævar Arnfjörð Bjarmason
The following example code will allow references to be added as footnotes.
|
==MY TOPIC== Lorem ipsum dolor sit amet, consectetur adipisicing elit, sed do eiusmod tempor incididunt<ref>John Brown, Annals of Something Something, (American Press, Jan. 1802): 121-4</ref> ut labore et dolore magna aliqua. Ut enim ad minim veniam, quis nostrud exercitation ullamco laboris<ref name="many">Fred Smith, Purposeful Pages, (Ridiculous Publishing, 1754): 3-6</ref> nisi ut aliquip ex ea commodo consequat. Duis aute irure dolor in reprehenderit in voluptate velit esse cillum dolore eu fugiat nulla pariatur. Excepteur sint occaecat cupidatat non proident<ref name="many">, sunt in culpa qui officia deserunt mollit anim id est laborum.</ref> ==Footnotes== <references/> |
MY TOPICLorem ipsum dolor sit amet, consectetur adipisicing elit, sed do eiusmod tempor incididunt[1] ut labore et dolore magna aliqua. Ut enim ad minim veniam, quis nostrud exercitation ullamco laboris[2] nisi ut aliquip ex ea commodo consequat. Duis aute irure dolor in reprehenderit in voluptate velit esse cillum dolore eu fugiat nulla pariatur. Excepteur sint occaecat cupidatat non proident[2] Footnotes |
GOOGLEMAP CODE
This Wiki is using Evan Miller's GoogleMap extension
The following is the correct code for the googlemap extension. The first gives a street map zoomed out enough to give a good idea of where the location is in the general scheme of things. The second is a satellite view zoomed in for better detail. (Note that I've removed the "e" from google so that the code could be displayed.)
<googlmap lat="41.455802" lon="-81.700117" type="map" zoom="12" controls="large">
41.455802, -81.700117, Riverside Cemetery in Cleveland, OH, USA
/Info\       3607 Pearl Rd, Cleveland, OH 44109-2301
/Directions\ [http://maps.googl.com Click here] to get driving directions
</googlmap>
<googlmap lat="41.455802" lon="-81.700117" type="satellite" zoom="16">
41.455802, -81.700117, Riverside Cemetery in Cleveland, OH, USA
</googlmap>
- Note that the marker is set by the line following the first set of tags.
- Zoom levels are 0 thru 17.
- Map types can be 'map', 'satellite', 'hybrid'
- Controls are 'small', 'medium', or 'large'
<googlmap lat="41.455802" lon="-81.700117" type="map" zoom="12" controls="large">
41.455802, -81.700117, Riverside Cemetery in Cleveland, OH, USA
/Info\       3607 Pearl Rd, Cleveland, OH 44109-2301
/Directions\ [http://maps.googl.com Click here] to get driving directions
</googlmap>
<googlmap lat="41.455802" lon="-81.700117" type="satellite" zoom="16">
41.455802, -81.700117, Riverside Cemetery in Cleveland, OH, USA
</googlmap>
Occasionally and frustratingly, Google will report that the key is invalid and say that you have to go generate a new one even though there shouldn't be any reason to suspect your key has a problem. The way to correct this is to add ?action=purge to the end of the Wiki's URL directly after "index.php5".
BOX CODE
The following is a sample quotebox as is used on this Wiki:
How to code it:
<div style="margin-left:1.0cm;margin-right:1.0cm;font-size:80%;border:1px solid #a3bfb1;text-align:left;color:#000;padding:0.8em 0.8em;">
<p style='font-style:italic'>"...the quoted material is entered here and should appear in italics."</p>
<p style="text-align:right">
--BOOK TITLE by The Distinguished Author's Name
</p>
</div>
What it looks like:
"...the quoted material is entered here and should appear in italics."
--BOOK TITLE by The Distinguished Author's Name
An alternate style:
| <div style="color: #000000;background-color: #C9E4E4;padding: 5px;margin: 10px;border: thin dotted #759BAE;"> Quoted material goes here. </div> |
Quoted text with a background color and a dashed border in blue. |
Still another boxed text style:
| <div style="padding: 5px;border: thin solid #666666;margin: 5px;font-family: Verdana, Arial, Helvetica, sans-serif;font-size: 82%;"> Text within a box is demonstrated here. </div> |
Text within a simple box is demonstrated here. |
TABLES
To generate a quick Wiki table, create a spreadsheet using some external program like Excel or OpenOffice, then copy the cells and paste them in at this website: Excel Spreadsheet to Wiki Converter. The generated text can then be copied and pasted into a Wiki page.
(Note that if you want borders, the table markup will typically not render them on empty cells. A couple of ways around this are to do a search and replace in your spreadsheet software to look for empty cells and replace them with period. Normally, in normal HTML markup, you would use a non-printing space (  ;) but the converter at the above website converts them to spaces, thus negating your efforts.)
COLUMNS
TWO COLUMNS
This is a demonstration of breaking the page up into two columns. The left column will have no background color, whereas the right column will have a light blue and have a slightly smaller text size. The columns can be separated by a thin black line. Just change the value of the border-right or border-left operator to 1px. It looks best having the border set at 0px for the shorter column and 1px for the longer.
How to code it:
<div style="float: left;width: 70%;border-right: 0px solid #000000;padding-top: 10px;padding-right: 15px;">
This is the left column<br>
{{lipsum}}</div>

<div style="float: left;width: 20%;border-left: 1px solid #000000;padding: 10px 0px 0px 15px;font-family: Verdana, Arial, Helvetica, sans-serif;font-size: 82%;background-color:#F0F8FF;">
This is the right

Lorem ipsum dolor sit amet, consectetur adipisicing elit, sed do eiusmod tempor incididunt ut labore et dolore magna aliqua. Ut enim ad minim veniam, quis nostrud exercitation ullamco laboris nisi ut aliquip ex ea commodo consequat. Duis aute irure dolor in reprehenderit in voluptate velit esse cillum dolore eu fugiat nulla pariatur. Excepteur sint occaecat cupidatat non proident, sunt in culpa qui officia deserunt mollit anim id est laborum.
</div>
<br style="clear:both">
What it looks like:
This is the left column
This is the right
Lorem ipsum dolor sit amet, consectetur adipisicing elit, sed do eiusmod tempor incididunt ut labore et dolore magna aliqua. Ut enim ad minim veniam, quis nostrud exercitation ullamco laboris nisi ut aliquip ex ea commodo consequat. Duis aute irure dolor in reprehenderit in voluptate velit esse cillum dolore eu fugiat nulla pariatur. Excepteur sint occaecat cupidatat non proident, sunt in culpa qui officia deserunt mollit anim id est laborum.
THREE COLUMNS
Use the following HTML code to create three columns of text.
Note that the text does not automatically wrap and fill the columns. You'll have to do that yourself and possibly be required to provide linebreaks where necessary to prevent run-on lines..
How to code it:
<div style="... width: 33%; float:left;">
'''column one text'''<br>
a<br>
b<br>
c<br>
</div>
<div style="... width: 33%; float:left;">
'''column two text'''<br>
m<br>
n<br>
o<br>
</div>
<div style="... width: 33%; float:left;">
'''column three text'''<br>
x<br>
y<br>
z<br>
</div>
What it looks like:
column one text
a
b
c
column two text
m
n
o
column three text
x
y
z
IMAGE CODE
Adding images to a page
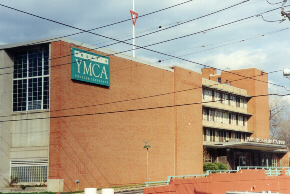
| [[image:YMCA.jpg|frame|30px|gfx on the right]] | |
| [[image:YMCA.jpg|frame|30px|center|gfx centered]]< | |
| [[image:YMCA.jpg|frame|30px|left|gfx on the left]] | |
| [[image:YMCA.jpg|thumb|gfx thumbnail]] [[image:Sunset.jpg|thumb|gfx thumbnail]] |
External Images and Text Wrapping
To use an image from another part of the server and have text wrap around it on the right, code the URL as follows. Note that a small padding of 20px was added to create a pleasant spacing between the image and the text.:
<p style="float:left;padding:20px;"> http://zodiacal.com/barbarowa/trees/photos/Fish,%20James%20Sr.jpg </p>
Follow the image styling with your text outside the paragraph closing tag.

Lorem ipsum dolor sit amet, consectetur adipisicing elit, sed do eiusmod tempor incididunt ut labore et dolore magna aliqua. Ut enim ad minim veniam, quis nostrud exercitation ullamco laboris nisi ut aliquip ex ea commodo consequat. Duis aute irure dolor in reprehenderit in voluptate velit esse cillum dolore eu fugiat nulla pariatur. Excepteur sint occaecat cupidatat non proident, sunt in culpa qui officia deserunt mollit anim id est laborum. Lorem ipsum dolor sit amet, consectetur adipisicing elit, sed do eiusmod tempor incididunt ut labore et dolore magna aliqua. Ut enim ad minim veniam, quis nostrud exercitation ullamco laboris nisi ut aliquip ex ea commodo consequat. Duis aute irure dolor in reprehenderit in voluptate velit esse cillum dolore eu fugiat nulla pariatur. Excepteur sint occaecat cupidatat non proident, sunt in culpa qui officia deserunt mollit anim id est laborum. Lorem ipsum dolor sit amet, consectetur adipisicing elit, sed do eiusmod tempor incididunt ut labore et dolore magna aliqua. Ut enim ad minim veniam, quis nostrud exercitation ullamco laboris nisi ut aliquip ex ea commodo consequat. Duis aute irure dolor in reprehenderit in voluptate velit esse cillum dolore eu fugiat nulla pariatur. Excepteur sint occaecat cupidatat non proident, sunt in culpa qui officia deserunt mollit anim id est laborum.
Lorem ipsum dolor sit amet, consectetur adipisicing elit, sed do eiusmod tempor incididunt ut labore et dolore magna aliqua. Ut enim ad minim veniam, quis nostrud exercitation ullamco laboris nisi ut aliquip ex ea commodo consequat. Duis aute irure dolor in reprehenderit in voluptate velit esse cillum dolore eu fugiat nulla pariatur. Excepteur sint occaecat cupidatat non proident, sunt in culpa qui officia deserunt mollit anim id est laborum. Lorem ipsum dolor sit amet, consectetur adipisicing elit, sed do eiusmod tempor incididunt ut labore et dolore magna aliqua. Ut enim ad minim veniam, quis nostrud exercitation ullamco laboris nisi ut aliquip ex ea commodo consequat. Duis aute irure dolor in reprehenderit in voluptate velit esse cillum dolore eu fugiat nulla pariatur. Excepteur sint occaecat cupidatat non proident, sunt in culpa qui officia deserunt mollit anim id est laborum. Lorem ipsum dolor sit amet, consectetur adipisicing elit, sed do eiusmod tempor incididunt ut labore et dolore magna aliqua. Ut enim ad minim veniam, quis nostrud exercitation ullamco laboris nisi ut aliquip ex ea commodo consequat. Duis aute irure dolor in reprehenderit in voluptate velit esse cillum dolore eu fugiat nulla pariatur. Excepteur sint occaecat cupidatat non proident, sunt in culpa qui officia deserunt mollit anim id est laborum.
Including Facebook Badge
<!-- Facebook Badge START --> [http://www.facebook.com/people/Sandy-Rozhon/1740990630 http://badge.facebook.com/badge/1740990630.588.1890538596.png] Sandy Rozhon's Facebook Profile <!-- Facebook Badge END-->
 Sandy Rozhon's Facebook Profile
Images as links
This Wiki is using the Template Click as found here: Template:Click
The following shows a full size image linked directly to a wiki page other than the image display page.
{{Click |image = Sbbanner_320.jpg |width = 300px |height = 149px |link = St._Barbara_Church |title = Go to St. Barbara Church page. |desc = top-right }}
The image can be also be reduced in size.
{{Click |image = Sbbanner_320.jpg |width = 150px |link = St._Barbara_Church }}
Galleries
To place a collection of images onto a page, use the <gallery> </gallery> tags. Here is an example of its coding. Note that the default for the gallery is four pictures per row.
How to code it:
<gallery>
Image:sunset.jpg|this is image 1
Image:sunset.jpg|this is image 2
Image:sunset.jpg|this is image 3
Image:sunset.jpg|this is image 4
Image:sunset.jpg|this is image 5
</gallery>
What it looks like:
By altering the gallery tag with one additional parameter, you can increase (or decrease) the number of pictures that display per row. The tag for the following reads as <gallery perrow="5"> .
How to code it:
<gallery perrow="5">
Image:sunset.jpg|this is image 1
Image:sunset.jpg|this is image 2
Image:sunset.jpg|this is image 3
Image:sunset.jpg|this is image 4
Image:sunset.jpg|this is image 5
</gallery>
What it looks like:


